Table of Contents
- Origins
- Wiresterizer
- Implementation
- Algorithmic optimizations
- Rendering loop
- Blender exporter
- JavaScript/Web implementation details
- The future
Origins
I looked into Gameboy Advance development on/off in the past few years. I was curious how some of the GBA games from my childhood were made.
One of these was Sonic Battle. I fondly remember its vivid art style and 3D graphics. Until recently it was the only 3D game I had seen on the platform.
After some research I discovered a ton of polygon renderers developed for the GBA. On top of released titles there’s a wealth of unreleased games and demoscene projects.
For example here’s Gearhead Garage Adventure, a cancelled game made by Lucas Pope of Papers, Please fame:
Here’s an impressive demo with available source code:
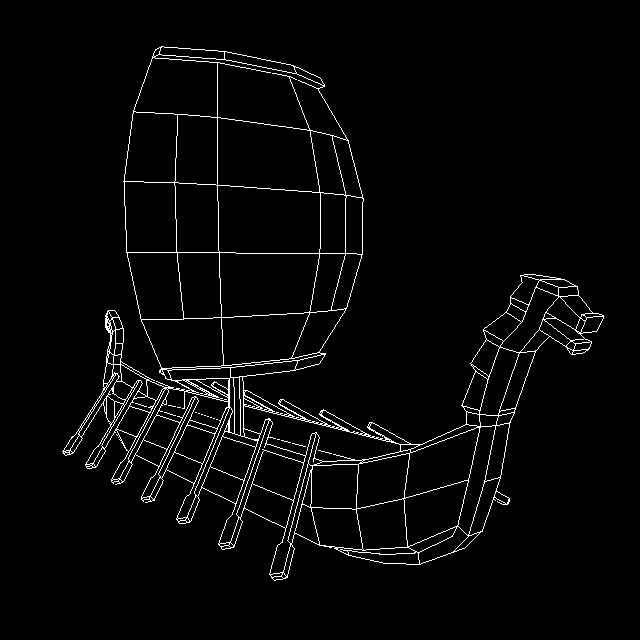
All of this sparked my interest in software rasterizers and I set out to make a wireframe rasterizer (Wiresterizer) to display a logo on my homepage. It really needed some decoration too.
Wiresterizer
Source code (TypeScript): https://github.com/Ohmnivore/wiresterizer
The models were made by Quaternius
Model:
Zoom:
Implementation
I followed Gabriel Gambetta’s Computer Graphics From Scratch series.
Because this is a wireframe/line renderer without vertex attributes, I didn’t need to implement most of the polygon-specific techniques.
Line-drawing algorithm
I used the classic Bresenham algorithm: http://tech-algorithm.com/articles/drawing-line-using-bresenham-algorithm
Clipping
I used the Cohen-Sutherland algorithm for line clipping: https://en.wikipedia.org/wiki/Cohen%E2%80%93Sutherland_algorithm
Algorithmic optimizations
The Cohen-Sutherland algorithm is done in 2D, in canvas space. This is because the camera facing axis is taken care of in clip space (simple line clipping at near plane). Far plane clipping was skipped because it wasn’t necessary but it could be done in an identical fashion.
Additionally, the mesh data’s layout fits the rendering loop well. It consists of a flat array of floats, using JavaScripts native-accelerated Float32Array. The rendering loop only needs to iterate through it one face at a time:
Face 1: num of vertices, vert1.x, vert1.y, vert1.z, ..., vertN.x, vertN.y, vertN.z
Face 2: num of vertices, vert1.x, vert1.y, vert1.z, ..., vertN.x, vertN.y, vertN.z
Face 3: num of vertices, vert1.x, vert1.y, vert1.z, ..., vertN.x, vertN.y, vertN.z
...
Finally, during face rendering an edge’s endpoint’s position in clip space is re-used for the next edge’s starting point:
A------B
 \     |
  \    |
   \   |
    \  |
     \ |
      \|
       C

* Calculate A and B, draw A-B
* Calculate C, draw B-C
* Calculate A, draw C-A
  ^ (A could be cached here, but I didn't find an elegant way of implementing it)
Rendering loop
- Resize screen buffer if necessary
- Clear screen buffer
- Update scene
- Update camera perspective matrix and dependant matrices
- For each model:
- Get model’s transform matrix in clip space
- For each face in the mesh data:
- Read number of vertices
- Transform the first vertex from mesh to clip space
- For each subsequent vertex:
- Transform from mesh to clip space
- Clip line between current vertex and previous vertex against the near plane (in clip space), skip steps below if both vertices are behind the plane:
- Transform clipped vertices to canvas space
- Clip against left, right, top, and bottom canvas edges using the Cohen-Sutherland algorithm, skip steps below if the lines is fully outside the planes:
- Draw the line to the screen buffer using Bresenham’s algorithm
- Upload screen buffer to canvas, or upload screen buffer to texture and render full-screen quad for WebGL
Blender exporter
I made a Blender exporter for a tiny file format for software rasterizers: https://github.com/Ohmnivore/io_mesh_wiresterizer
Its coolest feature at the moment is that it can output both binary and text files (through a unified back-end). The text version is very useful for debugging.
I also soon realized that JS and GBA platforms have very different needs. To make .wire a general-purpose format I’ll need to add a domain-specific language for describing data types and layouts. Something like:
// Faces are triangles. Store face normals as 8-bit unsigned
// integers, vertices as floats.
global: poly sides 3
face: face norm uint8, verts float

// Indexed mode
global: poly sides 4, face norm float, verts float
face: face norm idx uint16, vert idxs uint16

// Wiresterizer (N-gons)
face: verts num float, verts float
There’s a zillion trade-offs to make between size on disk, size in RAM, load times, and processing speed. The file format should support the variety.
Those are long-term plans though, at the moment it’s pretty specific to 32-bit floats and low-poly/wireframe rendering.
JavaScript/Web implementation details
WebGL texture uploading
Every frame the JS-side screen buffer array is uploaded to an OpenGL texture object (in the 8 bit luminance format). Then a fullscreen quad is rendered using the texture, with basically pass-through vertex and fragment shaders.
Canvas fallback
There’s a canvas fallback in case WebGL isn’t supported. It uses CanvasRenderingContext2D.putImageData to also copy the screen buffer. HTML5’s canvas can draw lines directly, but I discovered that there’s no way to turn off the anti-aliasing. It wasn’t the style I was aiming for so I decided to keep the screen buffer upload approach.
Frame sync
The main loop uses the requestAnimationFrame API which syncs with the browser’s window refresh timing. This usually matches the display’s vsync. Another benefit is that the browser can throttle the loop to save the client’s device’s battery.
There’s a fallback using a setInterval timer in case the newer API isn’t supported.
Mesh data
Each mesh is converted from its binary file to a typed array contained in a TypeScript source file using a Python script.
var array_sail_ship = new Float32Array(18234);
array_sail_ship[0] = 6.000000;
array_sail_ship[1] = -0.604884;
array_sail_ship[2] = 1.012157;
...
array_sail_ship[18231] = 0.020120;
array_sail_ship[18232] = -0.437526;
array_sail_ship[18233] = -3.396870;
This monstrosity is done for two reasons:
- No need to do any extra HTTP requests. Reduces loading time.
- No need to worry about endianness.
In practice the mesh data TypeScript files get compressed very efficiently and the mesh data is small to begin with. It’s certainly not something I would consider for a game but it’s perfect for a homepage.
Math library
I used an existing math library for vector and matrix math: https://github.com/matthiasferch/TSM.
Allocations
Allocations are kept to a minimum to reduce garbage collection stalls. I used Chrome’s memory profiling tools to find and eliminate allocations, often by moving them into static scope.
There were a few surprises. For example the () = > ... fat arrow syntax contains an allocation because it returns a function object.
I also removed the object-oriented functions from the TSM library which returned their results in new objects, removed the optional destination idiom, and moved some temporary variables from function to static scope.
Typed arrays
Typed arrays are used for mesh data and to represent vectors and matrices (courtesy of the TSM library).
Polyfills
Uint8Array.fill isn’t supported on some browsers, so I used Mozilla’s polyfill.
Browser compatibility
I want to maximize browser support because at the end of the day it’s meant for a homepage. It runs on Firefox, Chrome, Edge, and Explorer. Also tested on Firefox and Chrome mobile. All pretty recent versions, I should test with older ones.
Theoretically the limiting factors are typed arrays, WebGL/CanvasRenderingContext2D.putImageData(), and ECMAScript 5. These features are supported across the board since 2013.
The future
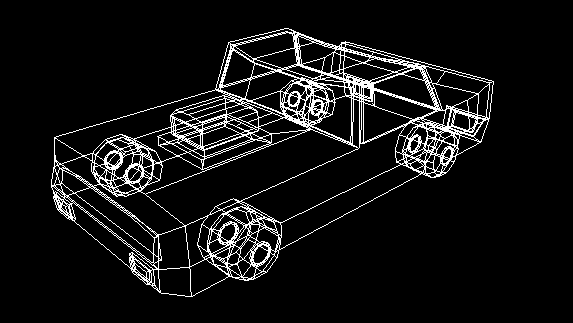
I also used Wiresterizer as a prototype for a GBA rasterizer. I realized however that wireframe rendering has too much visual noise. It would make it difficult for players to distinguish entities. That would depend on the kind of game, but I could tell it would be the case for anything fast-paced.
The solution would be to depth test (and backface cull) to clean up the visuals. Here’s a comparison:
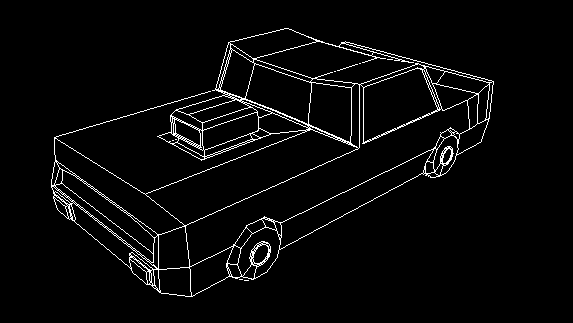
Depth testing would require a depth buffer which would require polygon rasterization. Line rasterization wouldn’t suffice.
I would opt for triangle rasterization rather than N-gons for simplicity and performance. However triangle wireframes are even more noisy:
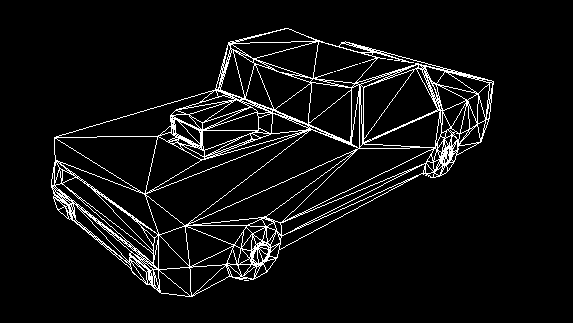
The solution would be to mark edges that belong to the N-gon faces in the mesh data. The triangles would be used for the first pass and would be invisible, affecting only the depth buffer. Then the N-gon edges would be drawn in a secondary pass. There would essentially be a triangulated mesh and an N-gon mesh for every model.